Every profession has its own set of linguistic terms. The gypsum board industry is no exception. Misconception over a specific terms is quite common, therefore we’d like to clear things up by answering the question, “What is level 5 drywall?”
We like to preface our answer by stating that Level 5 (or any of the other 4 levels) is NOT a description of talent, craftsmanship level, attention to detail, or in any way related to skill of the workman. When we were pricing out a job once, the potential customer shared that another competitor stated that our company was “only at level 4,” and that their company “was at level 5,” and therefore the customer should choose them, when in fact they presented a price quote based upon a Level 4 finish.
That is a completely incorrect usage of the term. It would have made as much sense as if the competitor had said, “We’re at banana and they’re at orange peel.”
The level system is just a set of descriptions of how much drywall mud is applied to the wallboard, and level of skill of the artisan applying it is NOT a factor.
Here is a very short description of each level, with a more detailed description with photos below.
Level 0: No drywall mud at all
Level 1: Only seams coated with mud & tape, screws not coated
Level 2: Seams coated with mud & tape, wiped, screws coated & wiped
Level 3: Everything from Level 2, plus another coat of mud over all screws and seams
Level 4: Everything from Level 3, plus another skim coat over all screws and seams
Level 5: Everything from Level 4, plus a thin coat of mud applied over all gypsum board. 100% coverage.
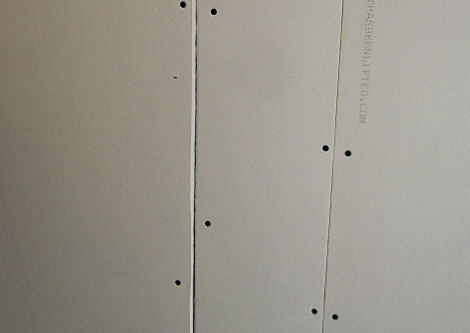
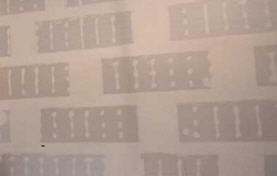
As its name implies, there is zero mud applied to the gypsum board when Level 0 finish is specified. As in the image above, the drywall is simply hung and all seams and screws are exposed.
Level 1 is the designation for the least amount of finishing wallboard. This is quite common in attics as well as utility rooms, which are areas that would generally be concealed from view or in areas that are not open to public traffic. For a Level 1 finish, only the seams need be covered, and the screws can be left exposed. The tape does not need be covered with joint compound to fulfill the requirements of Level 1, and as a result can be seen as in the image above. In Level 1, ridges and tool marks are acceptable. In some geographic areas this level is referred to as “fire-taping”. However, this level of finish does not typically meet fire-resistant assembly requirements, which is another topic altogether. “Fire-taping” can also be a loosely applied term for a Level 2 finish.
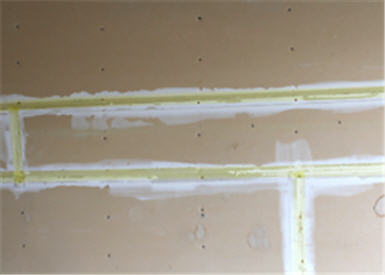
A Level 2 drywall finish is described as, “All joints and interior angles shall have tape embedded in joint compound and wiped with a joint knife leaving a thin coating of joint compound over all joints and interior angles.” The primary difference between Level 1 and Level 2 is that the latter has a thin coat of drywall mud over the joint tape. A Level 2 finish is typically called for in garages, warehouse storage areas and other similar spaces where the final surface appearance is not of concern.
A Level 3 drywall finish is specifically described as, “All joints and interior angles shall have tape embedded in joint compound and shall be immediately wiped with a joint knife leaving a thin coating of joint compound over all joints and interior angles. One additional coat of joint compound shall be applied over all joints and interior angles. Fastener heads and accessories shall be covered with two separate coats of joint compound. All joint compound shall be smooth and free of tool marks and ridges.”
In short, Level 3 is simply Level 2 with an additional thin coating of drywall mud.
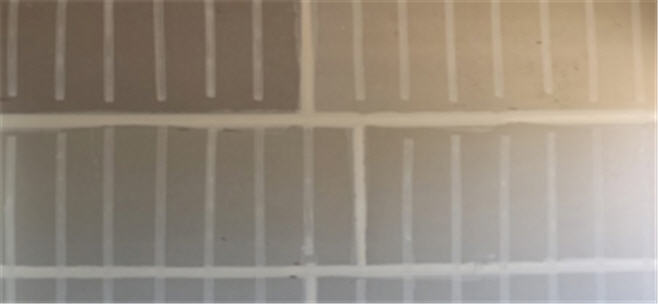
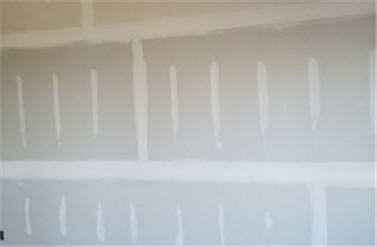
A Level 4 drywall finish is described as, “All joints and interior angles shall have tape embedded in joint compound and shall be immediately wiped with a joint knife leaving a thin coating of joint compound over all joints and interior angles. Two separate coats of joint compound shall be applied over all flat joints and one separate coat of joint compound shall be applied over interior angles. Fastener heads and accessories shall be covered with three separate coats of joint compound. All joint compound shall be smooth and free of tool marks and ridges.”
In addition to the above, every professional drywall contractor will sand all areas that have been coated with joint compound, including seams, screws, inside and outside corners, etc. Sanding is not specifically addressed in the technical definition of Level 4, but it is common practice in the trade and is absolutely necessary for a top-quality job.

A Level 5 drywall finish is described as, “All joints and interior angles shall have tape embedded in joint compound and immediately wiped with a joint knife or trowel, leaving a thin coating of joint compound over all joints and interior angles. Two separate coats of joint compound shall be applied over all flat joints and one separate coat of joint compound applied over interior angles. Fastener heads and accessories shall be covered with three separate coats of joint compound. A thin skim coat of joint compound shall be trowel applied to the entire surface. Excess compound is immediately sheared off, leaving a film or skim coating of compound completely covering the paper.”
Basically, Level 5 is simply Level 4, with an additional thin coat of drywall mud applied to everything. That means 100% joint compound coverage of not only seams, corners and screws, ball all gypsum board surfaces.
Level 5 is typically specified is areas with intense lighting.
An evenly applied thin coat of joint compound will not only conceal small imperfections in joints and on the surface of the gypsum board to help conceal joints, it will also create the appearance of flatness. Additionally, it will also smooth the texture of the paper, minimize differences in surface porosity, and create a more uniform surface to which the final decoration can be applied.
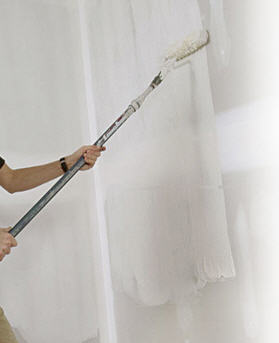
There are two common ways to apply joint compound to the entire surface of the gypsum board. One is by using a paint roller and rolling the mud on, as seen in the photo above. However, this method is relatively slow. The benefit is that the tools required are very affordable. The second method is by spraying it on. This is the method commonly used by professionals. It is much, much faster than rolling it on by hand, but the tolls to spray joint compound cost thousands of dollars.
Regardless of the method to apply the joint compound for a Level 5 Finish, the joint compound will have to be wiped flat with a drywall knife. In the image above, you can see a craftsman wiping smooth the joint compound that had been applied with a paint roller.
The Level 5 finish is required to achieve the highest degree of quality by providing a uniform surface and minimizing the possibility of joint photographing and/or fasteners showing through the final decoration. Level 5 is NOT standard in the industry. When you contact a drywall company for a price quote, unless specified otherwise, you’ll be getting a quote for Level 4.
Lastly, if you’d like information directly from a manufacturer, you can read U.S. Gypsum’s fact sheet on Level 5 Drywall Finish.