Basement Plumbing and How to Choose a Professional Plumber

Basement Plumbing is a type of plumbing work that is best left to the pros. The problem with basement plumbing is that any cracks or holes in the pipework will need to be patched or the pipe replaced. Repairing a damaged pipe or fixing a cracked or damaged pipe in the basement is a job best left to a professional.
This type of repair is crucial because most homeowners seldom visit their basements.
Unlike the rest of the house where a minor leak will most likely be spotted as a damp patch before much damage can occur, a leak will often be left unseen in a basement. That means they can often grow much bigger before they are seen. Quite often a basement may flood, and the first the occupants know of it is when the power goes off.
By that time the boiler or furnace and valuable belongings stored in the basement will have been damaged by submergence.
That’s why it is more than ever essential that basement plumbing is done right, and therefore it’s best to call a professional plumber to handle basement plumbing.
The main reason to call a professional plumber is to avoid the potential of damage to private property from a bodged DIY pipe installation or repair.
By doing your own basement plumbing, in usually rather poor lighting while balancing on a rickety ladder you put yourself at risk. You are more likely when working in poor lighting below ground to injure yourself or damage your property.
Even if you have the right tools and know-how to do basic basement plumbing jobs it’s best to engage a professional plumber.
If you do not hire a professional plumber to do the work for you, you could end up with a big mess and even larger repair bills. Also, do you really have the spare time and know-how to tackle the job yourself?
If you are new to the plumbing profession or unsure of your abilities, you may of course choose to attend a hands-on course led by a plumber who will be your tutor. That would be one way for you to gain the required skills to complete the work.
Experienced plumbing tutors are well-versed in all aspects of plumbing and can offer in-depth advice and guidance in completing such jobs to an acceptable standard. But, is that really what busy people do very often. No. Most of us simply don’t have the time.
So, we recommend that you hire a professional to complete the work on your behalf. A full-service professionally qualified, and if necessary, a licenced plumber can take care of all the tasks and work perfectly. A professional plumber can also offer other services, such as:
  • fixing new pipe connections
  • unblocking pipe clogs
  • ensuring that all pipes are lagged and protected against frost damage, before the onset of winter.
They also have many years of experience in completing numerous plumbing projects to high-quality standards.
Choosing a plumber who is fully qualified means that the job will get done perfectly the first time. It will be something that you will be proud of, knowing the job has been well done. A qualified plumber can save you time by preventing water damage, plus as a result, saving money and frustration too.
If you don’t know where to start from, get a plumber to help you find your way around the plumbing world! Find out which plumbing company/plumber/sub-contractor is a good match. It is important to get advice from someone you can trust.
And as always, try not to be swayed by the price – as much as possible. Try to get a reasonable price based on the work involved. The easiest way is to get a plumber who does the same sort of work often. The adage: “Practice Makes Perfect” applies here!
To get any job done properly the first time, you must always be clear about exactly what work you want to be done.
So do your homework to make sure you have all the information you need on the existing plumbing installed. Local laws and regulations vary. Check with the local plumbing society to make sure the plumber you select will have all the relevant qualifications you need.
Next, get some quotes from plumbers in your area, take the time and trouble of looking them up online. Contact several plumbers who seem to match your needs.
Ask the plumber to tell you exactly how long the job will take, and make sure they give you an estimate. To plan your budget you need an estimate. Ask for one in writing.
Get a written quote for the work you want to be done. When you do have the estimated price and a task list, check it against the job you want to be done. If you have a matching set of actions that will satisfy all your needs and these have been priced up that’s good Now get several more quotes, compare them for value, and your work in choosing the best plumber is made easy.
If the plumber does not give you an estimate, it is usually best to avoid that plumber and move on to another who will.  But, if you have no other plumber to choose from, ask how much they charge as hourly rates, and what sort of materials they use.
Go away and look up prices yourself, return and ask the plumber how long he thinks it will take. Ask how many men will be working on your project over the time period. Then you should have enough information to put a budget price on the work yourself.
Once that’s done, go back to the professional plumber and say that you reckon the price will be $x,000.
Very often they will start to negotiate a price with you when you do that.
Plumbers are becoming more experienced in water purification, and in garbage disposal equipment. More and more often they will install and maintain water filtration systems to purify your drinking water. They are also becoming more aware of your garbage disposal and will offer solutions for problems with sink maceration equipment if there are problems.
Ask a plumber about their fees, when working on those items too. The prices quoted will give you an idea of what you are going to have to pay.
Include the materials needed, as well. Ask about time and materials, including delivery. Do they have a particular date when they will be available to do the job, and if so, at what time?
In other words, do they guarantee their availability when you need them or are they only available “after due notice”.
We recommend buying the materials from a bargain hardware store giving them to your plumber for him to use. That way you will probably get the cheapest prices that are available in your area.
If you do an estimate yourself, you need to have a good idea of what you are going to need. Also, decide whether you are going to be doing most of it yourself or whether you are going to rely on the plumber to complete all, or just a part, of the job.
What you need to decide is what your budget is going to be. Also, determine whether you are going to go for a quick job or a quality one that will require more time to complete.
It is best to make sure that you get an estimate of the amount of money that you are going to be spending before you commit to any project. That way you will know what you are going to be spending.
It may be more than you have budgeted for by the end, but if so the contractor will need to back up cost rise claims with facts.
Facts as to where the extra costs have arisen will need agreeing and any reasonably chargeable additional costs paid for by the property owner. So, it is important that you should always get a written estimate of the bill, and that is important for two reasons:
1. If something should go wrong after the plumber has left, then you have proof that you paid for work that was agreed upon, and which has now been shown to be faulty. The estimate can then be used in a claim for the plumber to pay for faulty work if anything should go wrong soon after the plumber has left.
2. If the plumber is late for a meeting, you can get in touch and tell them that you need the work done. If the plumber is late for a meeting repeatedly then you have the right to dismiss that person and employ another.
Once you have these items sorted, and you can now look to take charge of your own plumber. Most plumbers will offer a written estimate and design drawings which you should use to compare with the charges for work on that day offered by other businesses which were keen to comply with the tendering rules.
That way you have proof that the job was done, and the correct price was been agreed upon and paid for.
1. A written estimate will help you get the best plumber for other jobs, and if anything should go wrong at a later date, you can go back to the written bill.
2. When the plumber arrives, make sure you go over everything with him or her. You need to make sure that you have explained exactly what you need to be done. If you do this before the plumber starts, you will save him a lot of time and trouble.
3. It is also good to know what you will be getting and to ask him/ her to make a sketch of it. That way you can get a visual description of what needs doing. If you do this and let him/ her begin the work, you will know exactly what he needs to do.
4. If the plumber is a new apprentice or a probationary plumber, then you should make sure you check his work record before he starts work. There is no harm in making sure that everything is up to date, and that he has a clean record.
5. Make sure you get a written guarantee, stating what he will do and how long it will last. In many cases, an employee of a plumbing company will be called upon to work on a long term contract with a building contractor. It can be good to know that you will be able to get the same plumber for a long term contract.
It is important that the plumber arrives on time, has gone over the job fully and has given you a clear written estimate. Once the plumber has begun the work you should have a full written description of the work, the price, and the estimated date for completion.
At the point when the work ends, you should call the plumber and discuss the work with him. Make sure that he is happy that the work has been completed and all safety matters resolved with the relevant authorities. Do this before you move back in with your family.

Steve is an established author and has also written articles about plumbing work in Glasgow. Check that website out as well at the Glasgow south plumbers.

How To Tape Angled Drywall Corners, And Sloped Ceilings

How-to Guide For Taping Off-Angle Corners, Slanted, Cathedral, Tray and/or Vaulted Ceilings

Taping drywall corners is where hobbyists and non-professionals have the most difficulty. 90-degree corners, both inside corners and outside corners are quite common. However, off-angle corners (any corner that isn’t 90-degrees) are not as common and this is where most non-professionals have the most difficulty.

In this article, we will provide the instruction for you to get a professional result when taping and finishing any off angle corner.

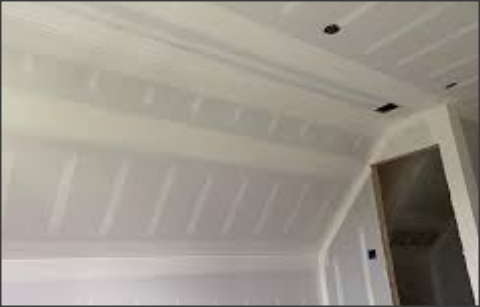
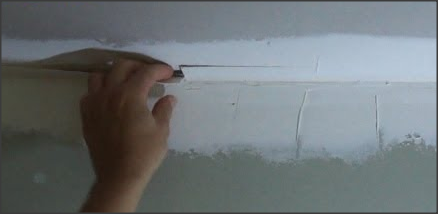
When two slopes of a structure come together and the angle where they meet is less than 180 degrees, that is described as a “splay”. The photo below should make it clear:

For those that have completed a basement, kitchen, or bathroom remodel and are looking for how to tape off angle drywall corners then there are a few steps that must be followed.

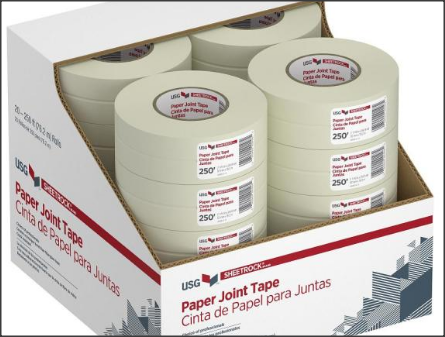
The first step is getting the right product for the job. The typical form of tape for a 90 degree inside corner is paper tape:

Rolls of Drywall Paper Tape

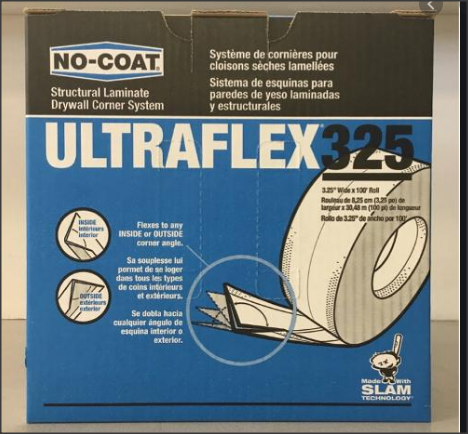
However, paper tape has no structural strength and will not provide the best result in a splay. Professionals use a product called Ultraflex 325 which can be seen in this photo:

Ultraflex 325

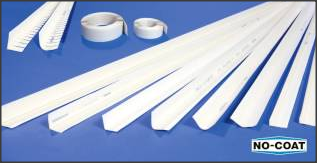
This is a paper-coated vinyl product that does have some structural strength. When folded to meet the angle of the splay, the product will remain quite rigid and straight as seen in the photo below:

Ultraflex 325 Becomes Rigid When Folded

This product is much more expensive than paper tape, but will provide a very high quality result. The following video provides excellent aubible and visual instructions on the proper way to install and finish the Ultraflex 325 in an off angle corner:

The next step in the process involves measuring the corner that has been created. This is important because the tape will be measured to fit the joint that has been created. It is also measured to ensure that the tape will be the right width when the tape is placed. It is important to remember that if you are taping off an angle that you are working on then the flat part of the tape needs to face in the direction of the hole in the drywall. This is to ensure that the tape is level at all times.

Once the tape has been positioned as the next step is to anchor it into the drywall. You will need to use some joint compound as seen in the video above.

If you are wondering how to tape off drywall corners, you will find that it is not nearly as difficult as it may seem. If you follow the steps that are provided by the manufacturer, you should have no trouble the tape. If you are looking for an easier way to handle the tape job, you can always hire a professional that can show you how to tape off angles in drywall.

Is Drywall Fireproof?

Is Drywall Fireproof?

Quick Answer: No, It Is Fire Resistant

Even though most drywall is actually fire resistant to an amount, type X and type C drywall are actually created especially to be utilized in fire rated assemblies. These items assist containing fire in the region of the origin of its better compared to normal drywall. When this particular drywall is actually fitted correctly, it delays heat and flames from spreading about rooms, floors, and structures, and it protects structural supports long enough for occupants to get away from and for structures to be preserved.

Gypsum is actually noncombustible The gypsum utilized to make drywall is actually a naturally occurring mineral composed of calcium sulfate dehydrate and drinking water. The presence of h20 in gypsum contributes greatly to drywall’s all-natural fire resistance. Whenever a drywall board is actually put through high levels of heat, water starts to be released from the board as steam. This particular procedure, referred to as calcination, will help to retard heat transmission with the panel.

As soon as all of the water has escaped the panel, the drywall goes on to act like a fire screen. When typical drywall is actually put through extreme heat, nonetheless, it shrinks because of the loss of water volume, as well as the panel is able to crack as well as break apart. This particular kind of disappointment allows the passage of heat and fire into the substrate materials and beyond.

Type-X As Well As Type C Fire Resistant Drywall

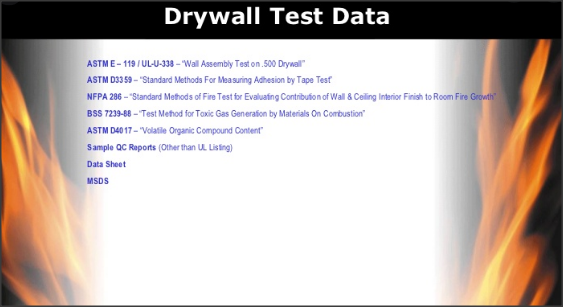
Fire rated drywall is actually described as “Type X” and should be third party accredited by an unbiased assessment and listing agency for example UL (Underwriters Laboratories Inc.) and ULC (Underwriters’ Laboratories of Canada) to satisfy the fire performance specifications recommended in the ASTM C1396 (CAN/CSA A82.27) Standard Specification for Gypsum Board.

Style X has excellent structural qualities In order to make drywall stronger under fire conditions, type X drywall is made by manufacturers, that has glass fibers added to the gypsum core. As h2o leaves these panels via calcination, the cup fibers serve as a reinforcing mat which prolongs a panel’s structural integrity and the safety qualities.

Type-X drywall is actually available only for 5/8 in. thickness, in widths of forty eight in. as well as fifty four in., and in lengths up to 14 ft. Type-X drywall meets ASTM International standards and it is often-used in fire rated assemblies like walls and ceilings which individual garages from living spaces.

Type C is better in performance Type C drywall is simply an improved type X item. Usually, type C panels have more glass fibers and an additional noncombustible material: vermiculite. A mineral, vermiculite expands as it is heated, so in fire conditions, it properly replaces water lost throughout calcination. This reduces board shrinkage and will help to maintain durability and power.

Type-C drywall can be obtained in the same lengths as well as widths as type X drywall and within thicknesses of 1/2 in. and 5/8 in. Type-C drywall exceeds ASTM standards and certainly will endure a blaze more compared to type X drywall. It is often-used in big buildings, like multifamily housing devices.

Installation notes Type X as well as style C are fitted like normal drywall. Even though the fire resistant characteristics of theirs are actually higher compared to daily drywall, these items are actually scored, snapped, and finished like regular panels.

A Beginners Guide To Installing Drywall Corner Bead

Installing drywall corner bead is a step that will require some basic carpentry skills and experience. It is a simple process but the fact that this installation is so simple means that many do not go through it the right way. The installation of a bead as the starting point for drywall corner pieces is often seen as the hardest part of installing your own drywall. However if you follow the right steps then it should be a easy as can be and you should be able to install your drywall in no time at all.

Step 1: Gather The Tools You’ll Need

The first thing that you will have to do in learning how to install drywall corner bead is to get the right tools out. You are going to need tin snips, a utility knife, screwdriver, nails, drywall trowel, rubber mallet and drill. These are the main tools that you will be using when installing your bead so make sure that you have them gathered and ready to go before you begin. The best way to find out what tools you will need is to ask the person at your local home improvement center. They will be able to tell you exactly what you need to get started.

These are some of the basic things that you will need to know when learning how to install drywall. You will want to make sure that you have all the necessary tools and supplies before you begin. It is a good idea to purchase a tape measure so that you will be able to properly measure the area that you are going to install the bead. It may take you a few tries to master how to install drywall corner bead but in the end it will be worth the extra time. When you finish your project, you will be glad that you took the time to learn how to install drywall corner bead.

Step 2: Attaching The Corner Bead

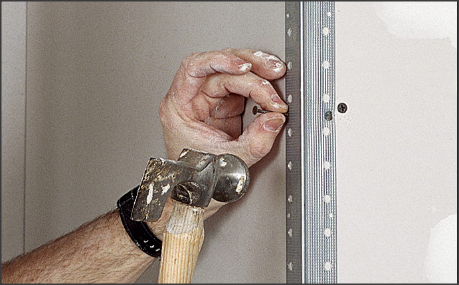
One of the most important things that a person should know when learning how to install drywall corner bead is that the corner part of the bead must face into your wall (see this page for instructions on installing round drywall corners). You cannot put one of these outside corner beads on the opposite side of your wall as it will not hold. Next you will have to cut the bead with the tin snips to just the length that the bead needs to be. Once the length is cut, you can nail it onto the corner. The video below provides easy-to-follow visual instructions.

Installing drywall corner beads can be a lot of fun for anyone who has basic skills. As long as you follow the tips above and the video below you should have no problems completing the task. If you are still unsure of how to install drywall corner bead, don’t feel bad about asking someone else to help you out. There are many people who will gladly help you get the information that you need to get the installation done right.

Step 3: Mudding The Corner Bead

The last thing that you will have to know how to install drywall corner bead is how to apply the joint compound. That is a skill that takes time and practice to develop.

How To Install Rounded Drywall Corners

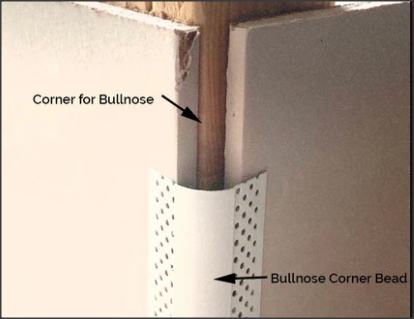
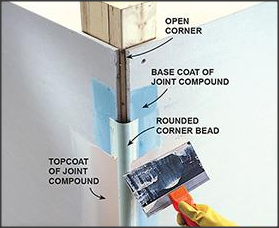
The concept of how to install rounded drywall corners – also called a bullnose corner – can be a little bit confusing for someone who doesn’t have any experience in this area. Oddly enough, you can actually purchase drywall that has been “rounded” at the factory, which is much cheaper than buying brand new material. In addition, if you are careful enough you can even get the edge of the rounded corner left slightly uncut to create a unique shape. Here’s how to install drywall rounded corners:

Round Drywall Corner Bead

First, make sure the drywall round corners you’ve chosen have been provided by the manufacturer as standard. Next, you’ll need to decide whether you want a metal rounded collar surrounding the corner molding, or if you want a vinyl rounded corner bead. If you’d prefer the metal rounded corner over the vinyl, know that metal is stronger but dents easier than vinyl.

Once you have decided on the type of material to use, you’ll need to choose the size of the radius. Two of the most common sizes are 1/2 inch and 3/4 inch.

Typically, the drywall rounded corners are applied with drywall nails or spray adhesive. It’s important to install your drywall rounded corner molding securely.

Another thing to keep in mind when creating this pattern is the distance between nails. With drywall nails, you should space them four to six inches apart. This creates a nice solid attachment that will not move. No movement means no cracking in the future. After the corner bead is installed, you will need to apply at least 2 coats of joint compound. Once dry, and and it is ready for paint.

Installing drywall rounded corners can give you an attractive finished product. However, it can also be quite difficult to do correctly. There are many things that you need to know before starting your project. It is recommended that you either hire a contractor to install your bullnose drywall corners or purchase the correct tools to complete this project properly.

A Helpful Guide To Fixing Roof Leaks

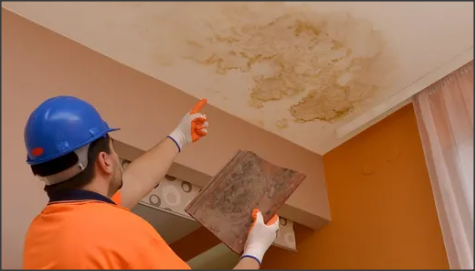
Roof leaks are a problem encountered by a lot of people. It is not very pleasant to see water pouring down from the ceiling or one’s house. This will affect your health and can even cause damage to the structure of your house. Whether you notice a leak while you are in the house or not, it is still good to know the different things one can do if they observe such problem. The article below provides some information about Roof leaks and the different things one can do if they experience such problem.

The common causes of roof leaks are: Broken or cracked shingles, improper installation of flashing around vents and windows, missing or improperly installed flashing around skylights, improperly placed or damaged skylight or downspout, or any other vent pipe, which allows water to get inside the house. These kinds of roof problems can also be caused by ice dams that form on the roof top. If left undetected, they can result in mold-related diseases and health risks.

If you see signs that your house may have leaking roof, one of the first things you should do is to have a professional contractor to inspect the house for such issues. This will give you a chance to find out if you are at risk from water intrusion, which could cause roof leaks and other damages. When inspecting, the inspector will check for: Copper piping or copper vent pipes that are exposed; caulking and repair work around vents and windows; flashing around vents; and loose shingles on the ceilings and side walls. You can prevent roof leaks by avoiding installing flashing around the vents; using non-combustible materials for roofing materials; using ceiling insulation materials for your roof and attic; and using weather stripping around your roof. You can have a professional contractor inspect your house regularly for water intrusion. This will help prevent the occurrence of roof leaks and other problems.

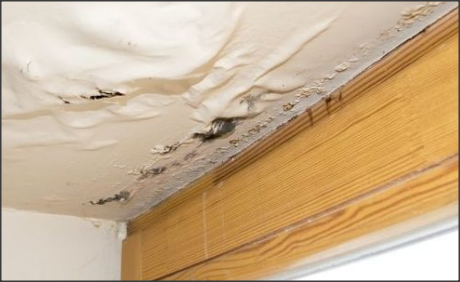
Aside from preventing roof leaks and damage, it is also important to repair or replace damaged ceilings and damaged walls. Since most leaks occur at the point where the ceiling and wall meet, having damage here can result to dangerous levels of moisture within your home. It is therefore important to repair damaged ceilings and walls immediately before the area becomes too wet.

Aside from damaged roofs and walls, roof leaks can also occur due to improper installation of roof vents. Improper installation of the vent can result to trapped moisture inside the house, which can eventually lead to serious damages. For instance, if the vent is placed close to the attic, there would be a gap between the two. When this gap is open, warm air from inside the house would accumulate and would cause the room temperature to rise above the norm, which can lead to constant humidity in the air, which is another contributing factor for roof leaks.

Roof leaks are inevitable, especially when doing roof construction. Thus, it is important to learn how to properly fix these problems as soon as possible to avoid further water damage. While there are a lot of do-it-yourself (DIY) ways to fix leaky roof problems, you should also know that hiring a professional roofing contractor can ensure a safe and timely repair job. They are more experienced and knowledgeable than you are, and can locate the exact location of the leak without cutting into parts of your house. This will definitely save you time, effort and money, and let you move on with your life.

How To Cut A Hole In Drywall

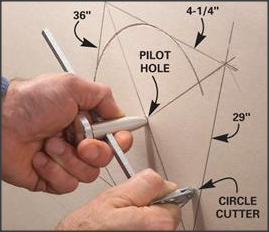
The internet is a great place to learn about various DIY drywall tips. If you have never tried to take out drywall before, you will quickly find that there are a lot of things that you do not know. It can be a little bit time consuming and a little bit of trial and error, but the end results will certainly be worth it. Here are some of the more basic ways of how to cut a hole in drywall.

The most common way of taking out drywall is with a cordless drywall router, but if that is not available, you may have access to a screwdriver. This is one of the more common DIY drywall tips that people follow. You can learn how to cut a hole in drywall using a regular screwdriver, but you can also use the electric drill if it is available. It just depends on what type of drywall that you are working on and how far off you want to go.

Some people prefer to use jigsaw bits as another one of the drywall tips. You can get these in a wide variety of sizes, so you should have no problem finding something to use. Be sure that you know how to handle the drill bit properly before you start trying to cut through the drywall with it.

You should know that you can also use an electric sander when you are learning how to cut a hole in drywall. This is used particularly with wallpaper, although it will work for drywall as well. You will need to read the instructions carefully before you begin, since using a sander without proper training can lead to your ruin rather than your improvement.

The next of the drywall tips you will get is about using a hammer to start the holes. Start by putting the drywall behind the wall that you want to fill in. Use a drywall knife to make holes that will fit through the wall, being sure that they are all lined up properly. You can then hammer them in using your hammer, and while you are hammering, you will want to make sure that you are going all the way in. If you are unsure about where to hit the holes, you can look at the drywall to see where it points.

You might also find that you have someone helping you out with some of the other drywall tips. This is always a good idea, because the person can help you drill the right holes. They will be able to tell you exactly how to cut a hole in drywall and they can help you keep the pieces together once the drywall is together. It will be easier to drill if you have someone nearby that can hold the drywall piece above the hole that you are drilling.

If you are trying to learn how to cut a hole in drywall by yourself, you should also know about some of the other things that you need to do. You need to make sure that the hole you are drilling is the same size as the drywall so that it will be stable. You will also need to anchor the drywall to the wall, because if it moves when you move it will be very unstable.

Knowing how to cut a hole in drywall properly can help you save money. When you are learning how to fix your own drywall, you should never rush through the process. You will need to take your time and learn all of the drywall tips that you can. The best way to learn the proper techniques is to get home and take a drywall class. There you will learn the basics and start practicing your skills.

How To Do Drywall Repair Yourself

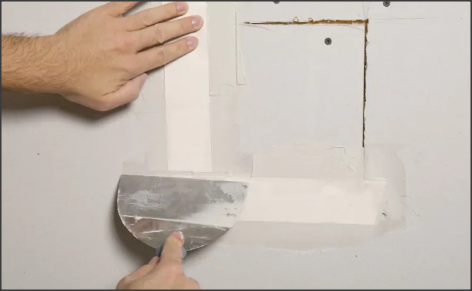
Drywall repair can seem daunting if you don’t know what you’re doing. While a professional contractor would be better at doing major installations or installing new walls, many say it can still be a DIY project, at least with some basic guidance. So strap on your work belt, grab the right beverage, and read these tips to learn drywall repair techniques so that you too can fix drywall yourself. For starters, let’s look at the problem.

Drywall repair starts with finding the problem area. Since drywall is mostly seen in ceilings and walls, it’s usually easy to see where the problems might lie. But checking other walls (or even ceilings) may also prove fruitful in your quest for out-of-the-way areas to fill in. Start by measuring the wall or ceiling.

Choosing the right materials is crucial to drywall repairs. There are two basic kinds: regular drywall and moisture-resistant drywall. If you are doing a repair in a humid, damp, or moist area, such as a bathroom or basement, it’s best to use moisture-resistant gypsum board. While installing gypsum board, make sure that you anchor it securely to the wall. Using an insufficient amount of nails or screws can result in minor cracks, so use screws or nails that are rated for drywall installation and use plenty of them to ensure your board is securely fastened. If you have doubts about your abilities to install tape and joint compound, hire a pro to avoid a home catastrophe.

Saving money on professional drywall repair cost doesn’t mean sacrificing quality. Sometimes fixing a dent or small hole isn’t all that difficult. But when you’re tackling massive holes, it’s best to call in pros. Professional drywall contractors know how to tackle large-scale projects like this, and they also have the tools and skills needed to make your ceiling look as good as new. Even if you fix just one or two small cracks, it will add years to the life of your ceiling. And that’s not something that you should overlook at all, seeing as ceilings are usually the first thing to fall apart after any disaster or accident.

If you have dents or cracks in your drywall, there are a couple of ways to repair drywall quickly and inexpensively. One of the easiest fixes involves removing the damaged part of the drywall and sanding it down until you get to the bottom. This allows you to smooth out the damaged area, then apply new drywall at the top. You may also want to consider adding fiberglass filler to the bottom part of the hole to make it look as smooth as possible. This not only makes it easier to match the new patch to your ceiling, but it prevents further damage to your drywall.

It’s important to understand that the simplest solutions involve patching up the visible areas and covering up the less noticeable cracks. If your wall is completely split in a corner, for example, you might choose to add caulking to keep the broken pieces from making their way into the rest of the drywall. The same goes if you have a large crack that goes from wall to wall, but don’t see a way to fill it. In this case, the simplest way to repair the crack is to fill it with drywall compound. However, you’ll also want to consider replacing the damaged part with a similar material to avoid a recurrence in the future.

Do Termites Eat Drywall?

What does a termite look like? How can you tell if your home is infested with termites or just normal drywall buildup? What does a termite look like, and how can you tell if there are termites in your home? How do termites eat drywall?

Termites can appear in many different forms and at any time. Usually termites will form mud tubes, but sometimes the worker termites can appear as white ants, tunneling around wood and releasing a sticky resin. Other signs of infestation include: sawdust, woodpecker holes, winged swarms, and worker ants looking for food. The most common signs of termite activity are sawdust in pileups, woodpecker holes, ant hillocks, mud tubes, and worker ants looking for food. Sometimes termites can be found living inside the wood of homes, but this is usually an infestation of the garage.

The only way to know what a colony of termites looks like is to read full post on them online. You can find a lot of information on the Internet about termite colonies, their life cycles, and their effects on structures and houses. If you want to know more about these pesky insects, do not be afraid to read full posts on them. It is better to be safe than sorry when it comes to your homes and belongings.

Two Kinds of Taping Drywall Techniques

So what taping drywall techniques are worth knowing? What are the top tricks of taping drywall correctly, and what are some great little secrets of taping drywall correctly so that it looks like a pro did it? So please help me out, as I need a few hints now that I am building a new house and am having my drywall installed.

First off, joint compound is what gives the tape that stick together when taping drywall. It also makes it much easier to clean later on, when the dirt has settled and you don’t have to scrub and pull. You may have to purchase some upgraded joint compound, or maybe get it at a hardware store or home center. There are many brands available, so it shouldn’t be a problem, but just make sure you pick the right brand.

Also, there are two types of taping drywall that you can use: one where you score the joint, and one where you glue the bottom and top together. If you are using scoring joint compound, make sure that the score line goes all the way around the board, it should just be a couple of millimeters from the first layer of drywall. If you are using the glue down method, make sure that the joint is well dried before beginning. I have used both methods, and they do look like the professionals did it…which is good, because I don’t know how to do it myself!

Call Now
Directions