Installing drywall corner bead is a step that will require some basic carpentry skills and experience. It is a simple process but the fact that this installation is so simple means that many do not go through it the right way. The installation of a bead as the starting point for drywall corner pieces is often seen as the hardest part of installing your own drywall. However if you follow the right steps then it should be a easy as can be and you should be able to install your drywall in no time at all.
Step 1: Gather The Tools You’ll Need
The first thing that you will have to do in learning how to install drywall corner bead is to get the right tools out. You are going to need tin snips, a utility knife, screwdriver, nails, drywall trowel, rubber mallet and drill. These are the main tools that you will be using when installing your bead so make sure that you have them gathered and ready to go before you begin. The best way to find out what tools you will need is to ask the person at your local home improvement center. They will be able to tell you exactly what you need to get started.
These are some of the basic things that you will need to know when learning how to install drywall. You will want to make sure that you have all the necessary tools and supplies before you begin. It is a good idea to purchase a tape measure so that you will be able to properly measure the area that you are going to install the bead. It may take you a few tries to master how to install drywall corner bead but in the end it will be worth the extra time. When you finish your project, you will be glad that you took the time to learn how to install drywall corner bead.
Step 2: Attaching The Corner Bead
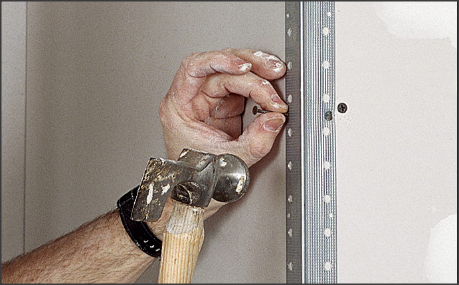
One of the most important things that a person should know when learning how to install drywall corner bead is that the corner part of the bead must face into your wall (see this page for instructions on installing round drywall corners). You cannot put one of these outside corner beads on the opposite side of your wall as it will not hold. Next you will have to cut the bead with the tin snips to just the length that the bead needs to be. Once the length is cut, you can nail it onto the corner. The video below provides easy-to-follow visual instructions.
Installing drywall corner beads can be a lot of fun for anyone who has basic skills. As long as you follow the tips above and the video below you should have no problems completing the task. If you are still unsure of how to install drywall corner bead, don’t feel bad about asking someone else to help you out. There are many people who will gladly help you get the information that you need to get the installation done right.
Step 3: Mudding The Corner Bead
The last thing that you will have to know how to install drywall corner bead is how to apply the joint compound. That is a skill that takes time and practice to develop.